Think about your favorite video game moments: the mysterious character with crucial information, the villager who nudges you toward a hidden path, the guide who sets your next objective. In Roblox, these moments come to life through NPC dialog.
NPCs (Non-Playable Characters) can speak to players using dialog bubbles that appear when someone approaches and interacts with them. This simple feature adds depth, direction, and personality to your game world.
Dialog shapes how players experience your map. It can point them toward new areas, reveal story elements, hint at danger, or spark curiosity.
Picture an NPC quietly saying, “I heard a strange noise coming from the cave…” Now the player has a reason to explore. What’s waiting inside? Enemies? A secret route? A hidden reward? A single line can trigger a full chain of discovery.
In this tutorial, you’ll learn how to create NPC dialog that guides players and gives your Roblox game its own sense of character and purpose.
1. Create an Avatar
Before you can add a Dialog object to your character or write something for your character to say, you're going to create a custom NPC avatar to add to your Roblox game.
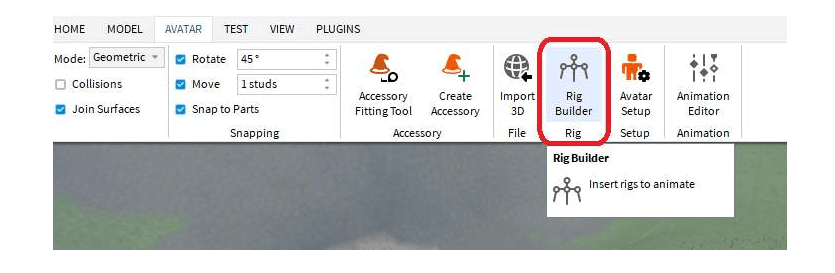
1. Select the Avatar toolbar tab, then click Rig Builder.
2. Set the Rig Type to R15 and select the Body Shape of your choice.
3. Click Skinned Avatar to create a new avatar.
The avatar you just created is an NPC, meaning the player won't be able to control them. This character will stand still wherever you place them, and you can even customize how they look (we'll tackle that tutorial another time!)
You can also give your NPC avatar a name by renaming the Rig model object in the Workspace:
In the Explorer, right-click on the Rig model and select Rename.
1. Type a name for your character, like "Game Hint", then press Enter to apply the change.
2. When you play your game, you'll see their name displayed above their head.
Add Dialog to Your NPC
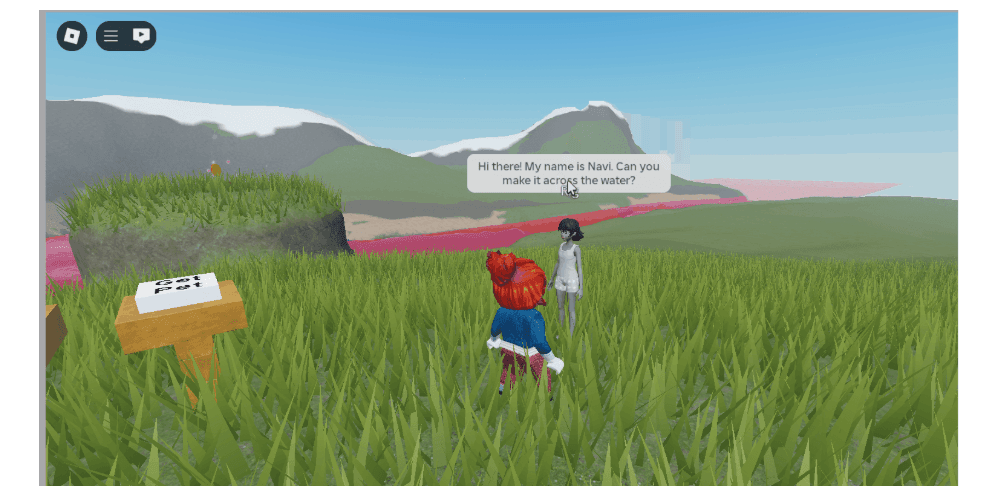
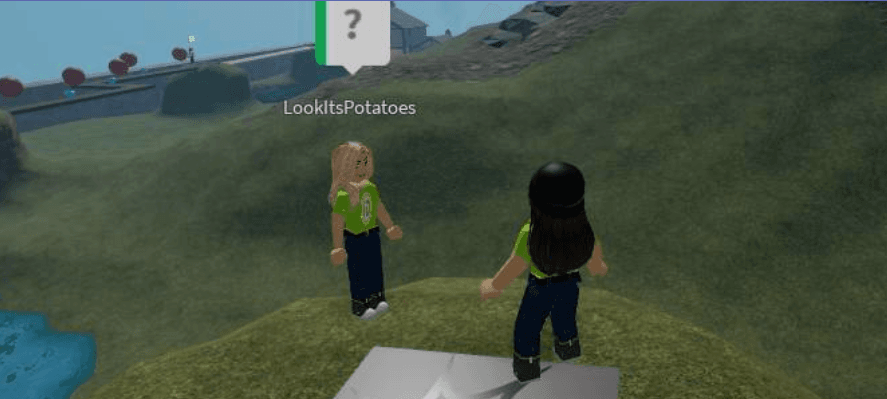
In Roblox, if an avatar has a dialog attached, the player will see a speech bubble above their head with which to interact, like in the example shown here:
You can use Dialog objects to explain the rules of your game to players, give them quests and hints, or even sell items. Players can read character dialog by clicking on the speech bubble.
Dialog objects should be added to the avatar's Head object so the bubble appears above their head like they're speaking.
1. Click on the ???? Rig toggle to expand the list of objects attached to it.
2. Navigate to the Head object and click the + Insert icon.
3. Search "dialog" and select the Dialog object to insert.
4. Select the new Dialog object you just added, then navigate to the Properties window.
5. Follow along with the tabs below to customize your Dialog object
Customizing NPC Dialog
You can take dialog a step further by implementing these dialog properties:
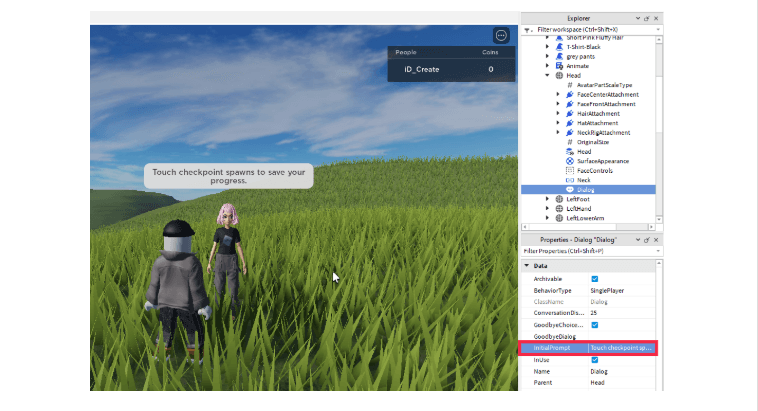
Initial Prompt
Properties > Data > InitialPrompt to change the initial dialog the character says.
Purpose
Properties > Data > Purpose to change the icon displayed in the Dialog bubble.
- Help: ?
- Quest: !
- Shop: $
This gives your players an idea of the type of information the NPC will give them.
Tone
Properties > Data > Purpose to change the color of the Dialog bubble.
- Enemy: Red
- Neutral: Blue
- Friendly: Green
Tip: If the NPC avatar's name is getting in the way of reading their dialog, you can hide it in the avatar's Humanoid object properties:
1. In the Explorer, navigate to Rig > Humanoid.
2. In the Properties window, set the following:
Properties > Data >
DisplayDistanceType: None
That's it! You’ve successfully brought your NPC to life by creating a custom character and giving it its own dialog. That single interaction is a powerful tool for guiding players, building story, and making your game feel more intentional.
Now it’s time to experiment. Playtest your experience and interact with your NPC to see how the dialog feels in action. Then duplicate that character and place it at the end of your objective, updating the dialog to reflect what the player has accomplished. This simple change helps reinforce progress and creates a stronger sense of completion.
Kids and teens can dive deeper with guided Roblox coding classes and Roblox summer camps where they'll learn to design smarter NPCs, build interactive worlds, and create gameplay that keeps players coming back.