Your 11-year-old keeps asking how to make a game like Minecraft or Roblox, but you're not sure where to start, especially without a computer science degree in the family.
The good news is, today's no-code game engines let kids and teens build real, playable games using visual logic instead of typing code. No syntax errors, no semicolons; just drag-and-drop creativity that teaches problem-solving along the way!
This guide walks you through one of the most beginner-friendly options - GDevelop - and shows you how to help your child build a side-scrolling platformer from scratch, step-by-step.
Best No-Code Game Platforms (and When to Use Each)
Before diving into GDevelop, it helps to understand the landscape. Different platforms shine for different ages, project types, and goals.
GDevelop (ages 10+) is a free, open-source 2D game engine with visual event scripting.
- Best for: platformers, puzzle games, and kids ready to move beyond Scratch but not yet comfortable with text coding.
- Exports to web, Windows, Mac, Linux, iOS, and Android.
Unity with Playmaker or Bolt (ages 13+) brings visual scripting to a professional 3D engine.
- Best for: teens ready for industry-standard tools who want to build 3D games without learning C# yet.
- Steeper learning curve than GDevelop.
Buildbox (ages 12+) specializes in hyper-casual mobile games with minimal logic.
- Best for: quick prototypes and kids who want to publish to app stores fast.
- Paid plans required for full export options.
GameMaker (ages 12+) offers drag-and-drop actions alongside its own scripting language (GML).
- Best for: 2D games with more polish than GDevelop.
- Less beginner-friendly.
For this tutorial, we're focusing on GDevelop because it's free, works on any computer, and strikes the best balance between power and simplicity for first-time game makers.
Making 2D vs. 3D Games Without Coding
One of the first questions parents ask: should my child start with 2D or 3D? Here's the difference.
2D games (like platformers, puzzle games, and top-down adventures) are easier to design and faster to build. Tools like GDevelop, Scratch, and GameMaker focus on 2D. Your child can finish a playable 2D game in a weekend, which builds confidence and teaches core concepts like collision detection, scoring, and level design.
3D games (like first-person explorers or racing games) require spatial thinking and more complex logic. Roblox Studio and Unity with Playmaker handle 3D, but the learning curve is steeper. Kids often spend more time positioning objects in 3D space than building gameplay.
Most of the time, start with 2D, even if your child dreams of making a 3D game. The logic skills transfer directly—events, variables, and behaviors work the same way in both dimensions. Once they've built two or three 2D games in GDevelop, moving to Roblox or Unity feels like a natural next step (and not a frustrating leap).
Let's get started.
1. Download GDevelop & Create an Account
Parents: This section requires downloading and installing software. Walk through these steps together rather than letting your child proceed solo—it's a good chance to talk about where files live on your computer.
GDevelop is free and open-source. While it works in a browser, downloading the desktop app provides access to all of its built-in features. Get started here.
You'll also need a GDevelop account to publish a finished game. You don't need one to start building, but it's worth setting up now.
2. Create a Project
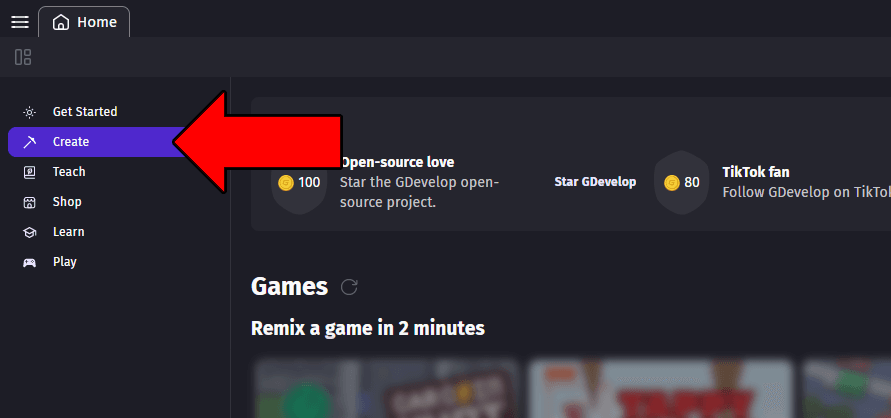
Open GDevelop on your computer, and from the Home tab, select Create in the left sidebar, then click + Create new game.
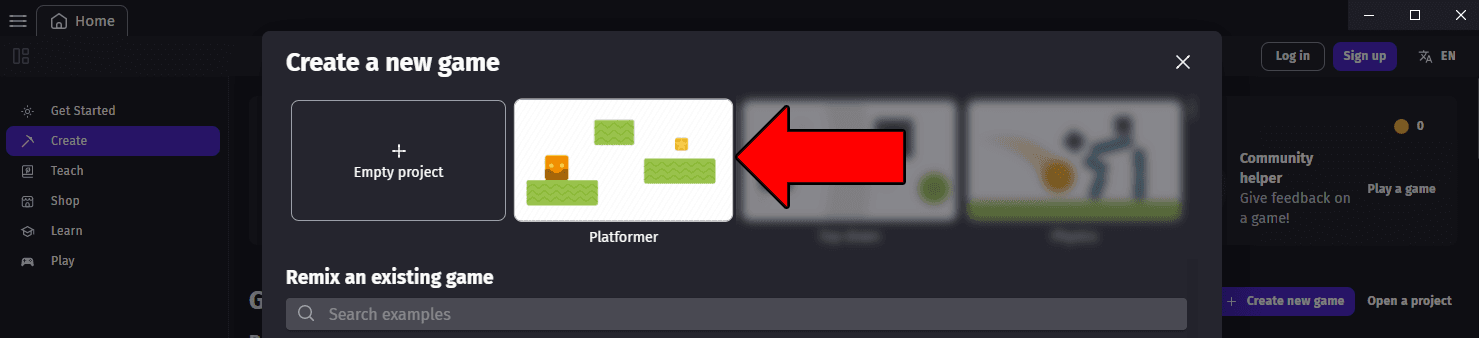
When the new project window opens, select the Platformer template. Give your project a name (like "Platformer"), and set the storage location to Your computer (not the Cloud). Saving to GDevelop Cloud puts your project at risk of being lost.
Save to a dedicated folder. Create a subfolder on your Desktop specifically for this project. Keeping everything organized now saves headaches later.
Once your project is created, take a minute to explore the GDevelop interface:
The Project Manager (top-left) is where you'll view your game's scenes and settings.

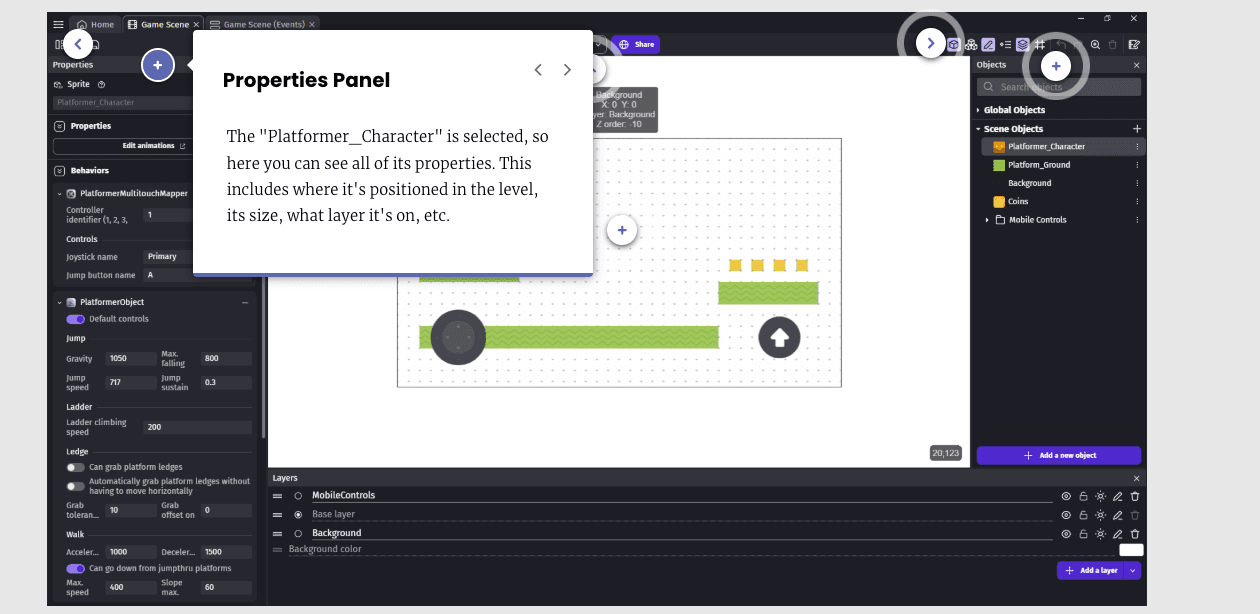
The Properties Panel (left side) shows details about any selected object, including its position, size, and layer.
The Scene (center) is your level canvas. The white box shows what's visible during gameplay; everything outside it is extended level space.

The Toolbar (top-right) gives you access to all panels. Objects, Properties, and Layers are open by default.
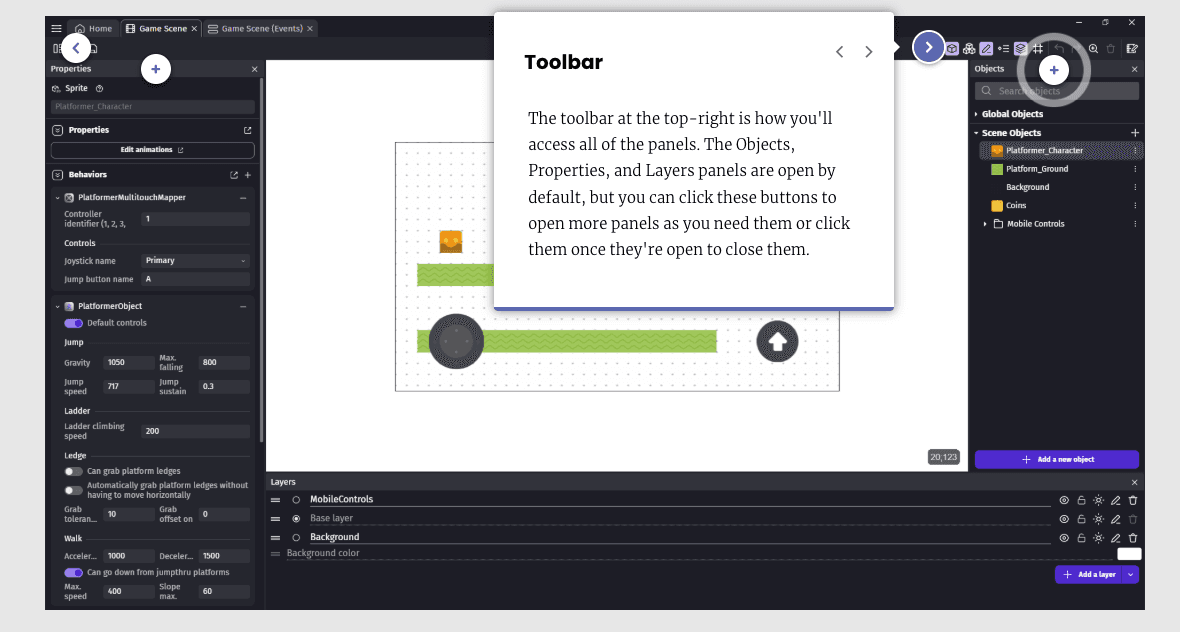
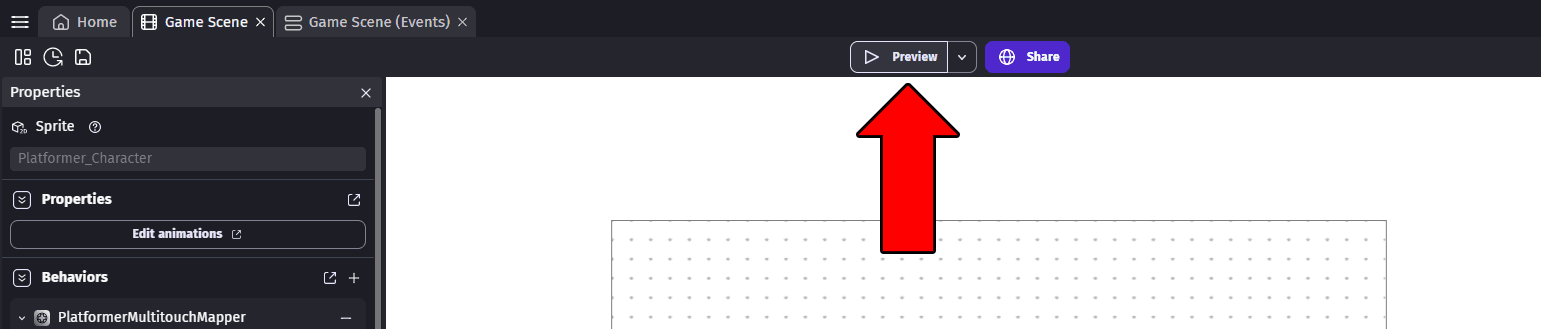
The Preview button playtests your game at any time. The Share button is how you'll export it when you're done.
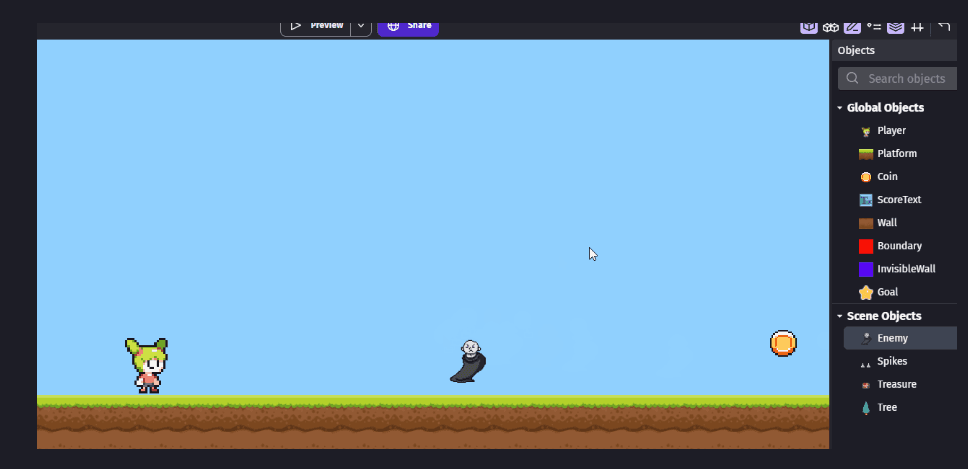
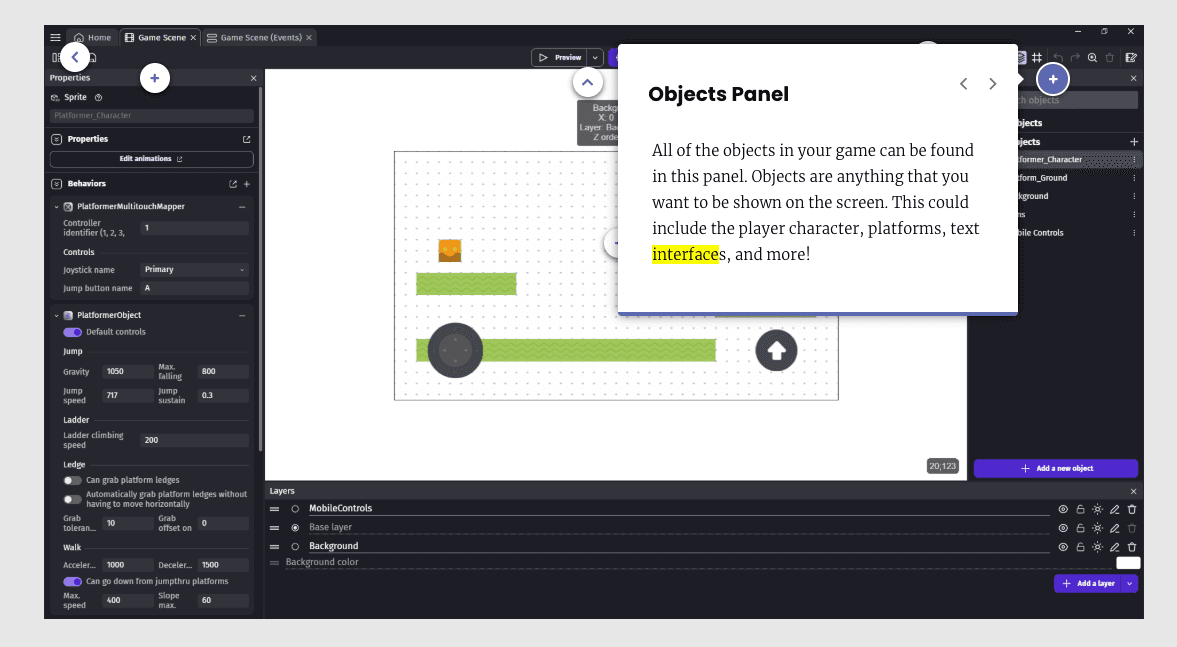
The Objects Panel (right side) lists every object in your scene, from the player character to platforms to collectibles.
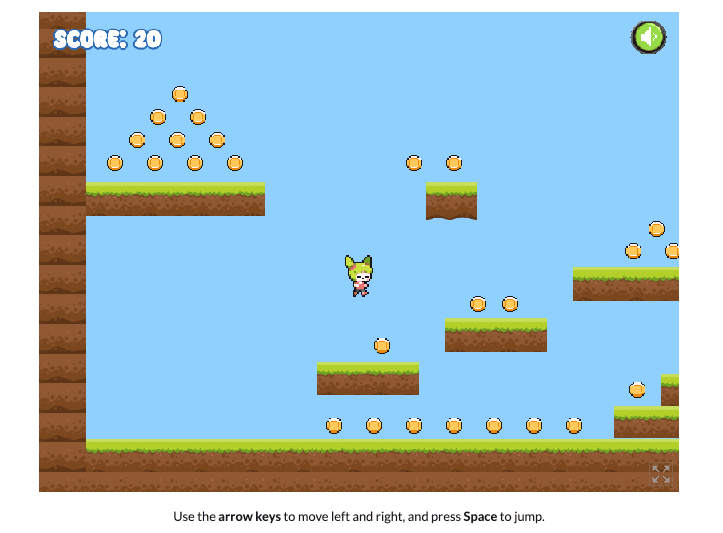
Have your child click Preview to play the template game using the arrow keys and Spacebar. This gives them a taste of what they'll build. When they're done, close the preview window to return to editing.
Save early, save often: Use Menu > File > Save or the icon in the top-left corner.
3. Build Your Scene
Your game is organized into scenes, where each scene is a level, screen, or location. Think of them like levels in Mario: a title screen is Scene 1, Level 1 is Scene 2, and so on.
To create your own scene:
Click the Project Manager icon to open it.
Next to Scenes, click + Add a scene.
Name it "Level 1" and press Enter.
Click your new scene to open it.
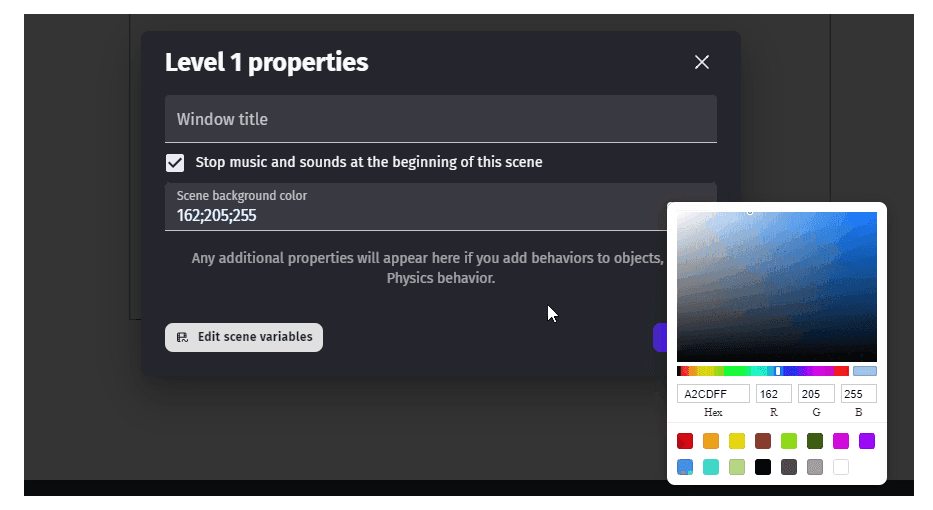
Customize it by clicking Options next to your scene name, selecting Edit scene properties, and changing the background color. Light blue works well as a sky.
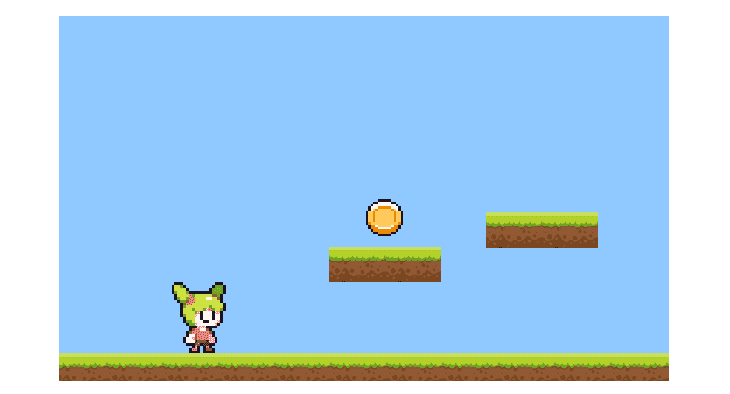
4. Add Your Player Character
In GDevelop, everything you see in a game (characters, platforms, coins, buttons) is an object, managed in the Objects panel on the right side of your screen.
To add a character:
In the Objects panel, click + Add a new object.
Select the Asset Store tab and browse the Characters category.
Open Object Filters and check: Multiple frames and Multiple states (under Animation), Side view (under Viewpoint), and Sprite (under Type).
Pick a free character. Look for the CC0 (public domain) license label.
![]()
Click Add to the scene, then close the window.
⚠️ Avoid downloading Asset Packs. These bundle dozens of extra files you don't need. Download sprites one at a time.
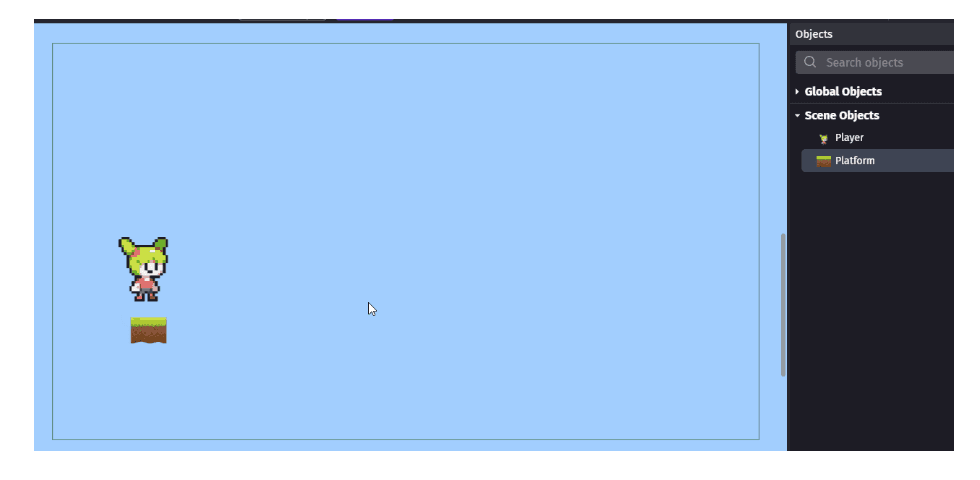
Rename the object to "Player" (click ⋮ Options > Rename), drag it into your scene, and resize it by holding Shift while dragging a corner.
![]()
5. Add a Platform
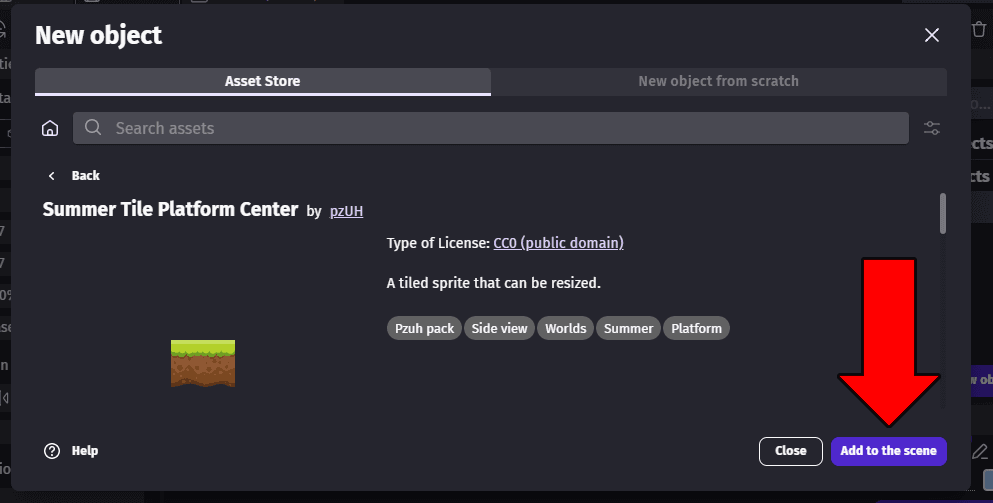
Now your player needs somewhere to stand. You'll add a tiled sprite for the ground, an image that repeats seamlessly to fill any width.
Click + Add a new object and return to the Asset Store.
Browse the Backgrounds category.
In Object Filters, check Sideview and Tiled sprite.
Choose a free platform image (search "platform" if needed) and add it to the scene.
Rename the object "Platform."
Drag the Platform into your scene, select it, and stretch it across the full width of the game screen. Place your Player above it.
Design your level: You can drag additional copies (called instances) of the Platform object into the scene to create floating platforms. Extend the ground beyond the screen boundary to make a longer level. Try these challenges to expand your layout:
- Add two or more floating platforms.
- Extend the ground outside the scene boundaries to make the level longer.
- Create a wall or steps using stacked platform instances.
6. Add Behaviors (Make Things Move)
Right now, nothing in this game moves. That's where behaviors come in. Behaviors are pre-built chunks of logic you attach to objects to give them abilities like walking, jumping, or camera-following.
Player movement:

In the Objects panel, click Options on your Player and select Edit behaviors.
Click + Add a behavior and select Platformer character.
Leave the default settings and click Apply.
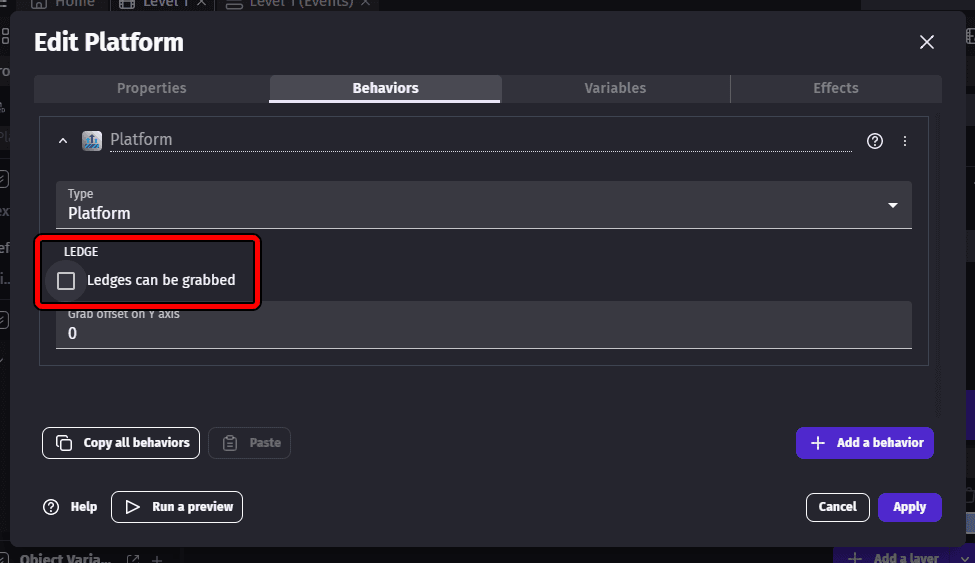
Platform collision (without this, your player falls straight through the ground):
Open the Platform object's behaviors.
Add the Platform behavior.
Uncheck Ledges can be grabbed, then click Apply.
Have your child click Preview and test it out. Use the left/right arrow keys to move and Space to jump.
Camera behavior (for longer levels):
If your level extends beyond the screen, add one more behavior so the camera follows your player:
Open Player behaviors and click + Add a behavior.
In the category dropdown, select Camera.
Add the Smooth platformer camera behavior and click Apply.
7. Add Collectibles with Events
To make your game interactive, you'll use events. Events follow an "if/then" logic: if the player touches a coin, then delete it from the scene.
First, add a collectible:
In the Objects panel, add a new object from the Asset Store (search "Coin").
Apply the Multiple frames filter and choose a free sprite.
Drag an instance into your scene.
Then create the event:
Click the Level 1 (Events) tab at the top of your project.
Click + Add an event, then Add condition.
Search "collision," select the Collision condition, and set Object 1 to Player and Object 2 to Coin. Click Ok.
Click Add action, select your Coin object, search "delete," and select Delete the object. Click Ok.

Preview your game and walk into the coin. It should disappear on contact.
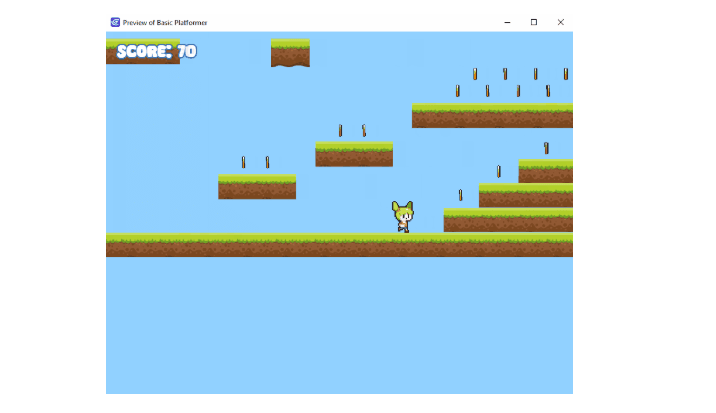
8. Track the Score with Variables
Deleting a coin is satisfying, but players want to know they're earning something! You'll track the score using a variable, a container that stores information (like a number) that events can update during the game. Every time the player collects a coin, the Score variable increases.
Create the variable:
Click the Project Manager button.
Under Project settings, select Global variables.
Click + Add a variable, name it "Score," keep Type as Number and Value as 0.
Click Apply.
Using a global variable (rather than a local one) means the score carries across all scenes and levels in your game.
Connect it to your coin event:
Go to the Level 1 (Events) tab.
In your existing coin collision event, click Add action.

Select the Other actions tab, then navigate to General > Variables > Change variable value.
Set Variable to Score, modification sign to + (add), and value to 10 (or any number you'd like).
Click Ok and save.
9. Display the Score On-Screen
The score is tracking behind the scenes, but players can't see it yet. You'll add a Text object that updates in real time as coins are collected.
Add the text object:
In the Objects panel, click + Add a new object.
On the New object from scratch tab, select Text.
Set the Object name to "ScoreText," size to 50, and choose a font from the Asset Store.
Set the Initial text to Score: 0 and click Apply.
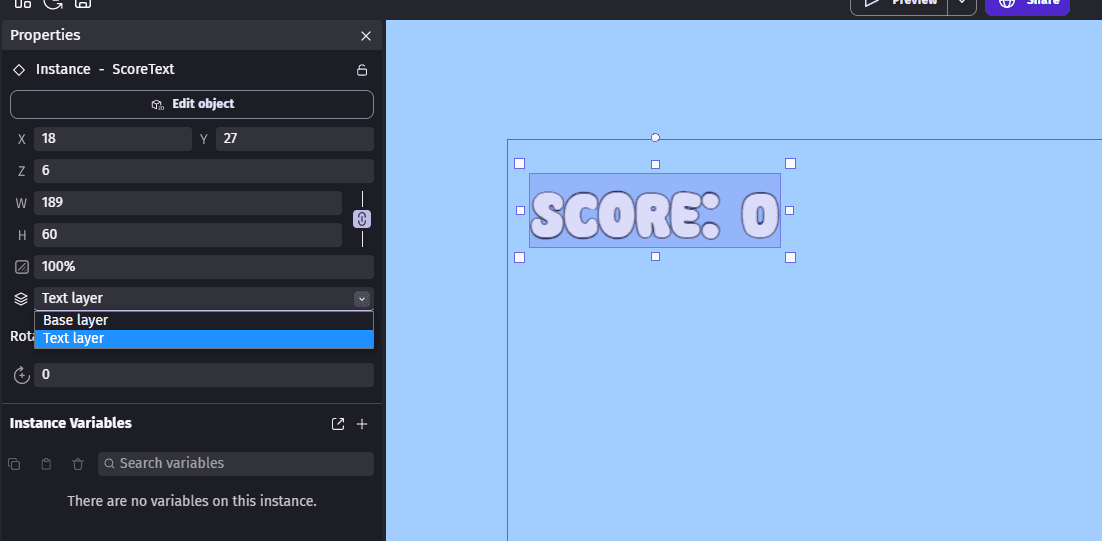
Drag the ScoreText object into the top-left corner of your scene.
Fix the text disappearing with the camera:
If you added the Smooth Camera behavior, the score text will scroll off-screen with the level. Fix this by placing it on its own layer:
Open the Layers panel at the bottom of the project window and click + Add a layer.
Name it "Text Layer."
Click the ScoreText object in your scene, and in the Properties panel, set its Layer to "Text Layer."
Update the text dynamically:
Go to the Level 1 (Events) tab.
In your coin collision event, click Add action.
Under Objects, select ScoreText, then select the Text action.
Set the modification sign to = (set to) and type the following in the Text box:
"Score: " + GlobalVariableString(Score)
Click Ok, save, and preview.
When you collect a coin, the on-screen score should now increase by 10 (or whatever value you set).
Your game is playable, scoreable, and ready to expand.
You Built a Game Without Writing a Single Line of Code
That's no small thing. In this guide, you set up a project, designed a level, added a playable character, programmed movement with behaviors, created interactive events, and built a working score system. The core of a real, playable game.
GDevelop has a lot more to explore from there: enemy characters, sound effects, multiple levels, and more. But the foundation you've built here is the same one every GDevelop project starts from. Keep experimenting, keep adding to your level, and see where it goes.
Next Steps: From GDevelop to Game Design Courses
If they're hungry for more, iD Tech offers game design courses and summer camps where kids and teens (ages 7–18) go deeper—building multiplayer games, designing polished levels, and even publishing to app stores. Our instructors guide students through GDevelop, Roblox Studio, Unity, and Unreal Engine, matching the tool to the student's age and goals. Find a course.